Appointments Manager: Managing Categories, Sub-Categories and Locations
Categories, Sub-categories and Locations are foundational building blocks to creating Guest View pages for booking appointments. When implementing your project, one of the first steps you will take is creating a list of the Categories and Sub-Categories that define the types of appointments you will book along with each of the locations where consumers will meet. Note that you do not need to create sub-categories if this level of granularity is not helpful in guiding consumers to the right location or calendar provider. To reduce maintenance and troubleshooting, a recommendation is to start simple with fewer categories and sub-categories with General Guest Views and add more complexity over time as needed.

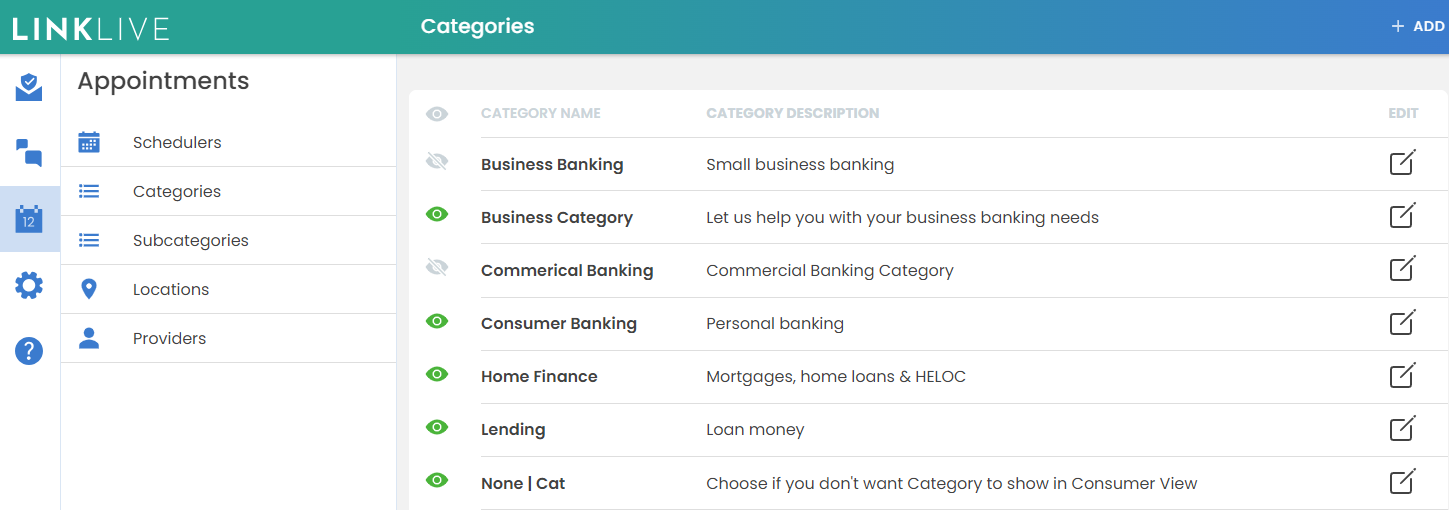
Appointment Managers will manage Categories, Sub-categories and Locations from the Appointments icon in left hand navigation bar of LinkLive or LinkLive Mobile. Clicking on the link displays the list of objects that have been added. Clicking the Add button in upper right will add new objects. Red asterisks indicate mandatory fields. Users will add the data and click ADD to save. Note that when an object is updated, the new data is instantly visible in any new or existing Guest Views that use this object. This is a powerful feature for managing your Guest Views. For example, if a location’s address or phone number changes or if the name of a product or service changes, you can update the data once and it automatically propagates to all guest views that use that object.

Accessing Categories, Sub-Categories and Locations
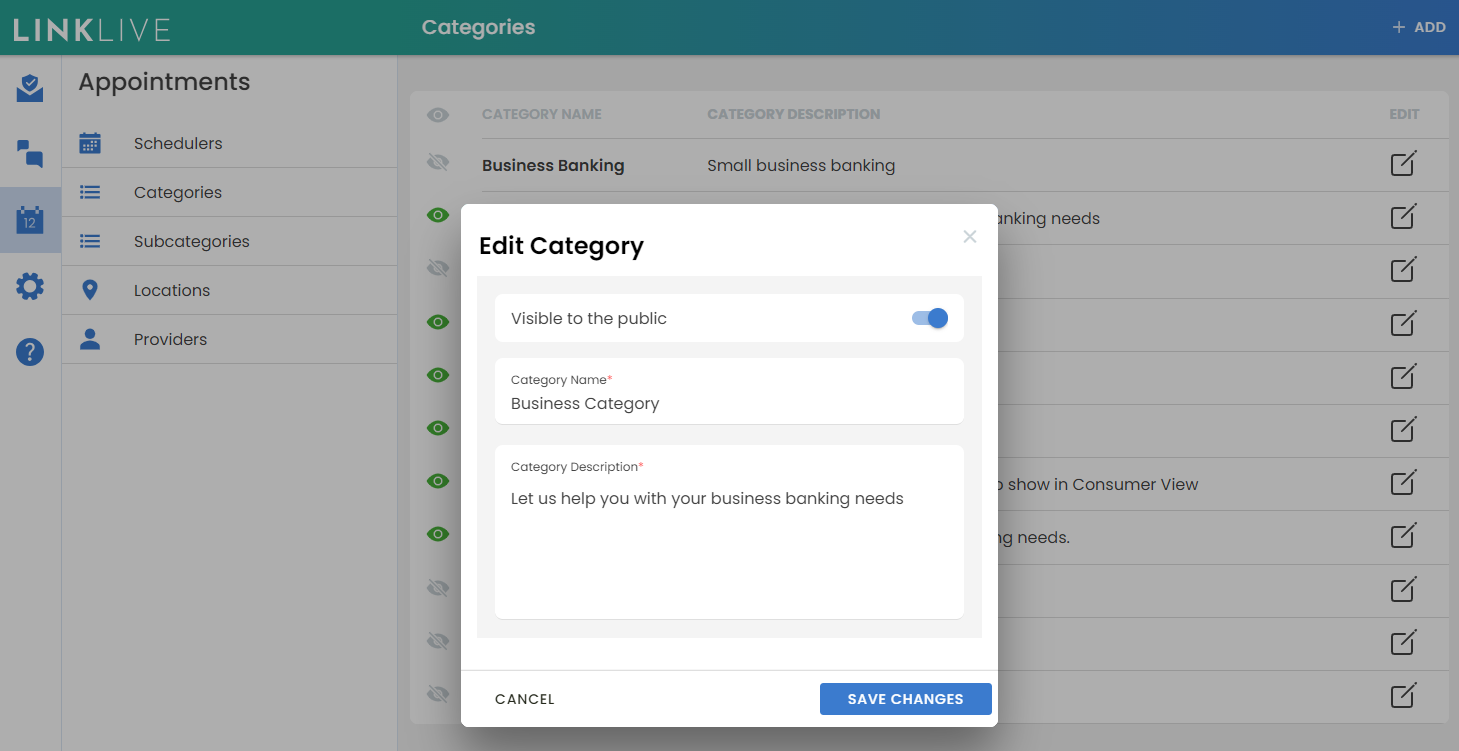
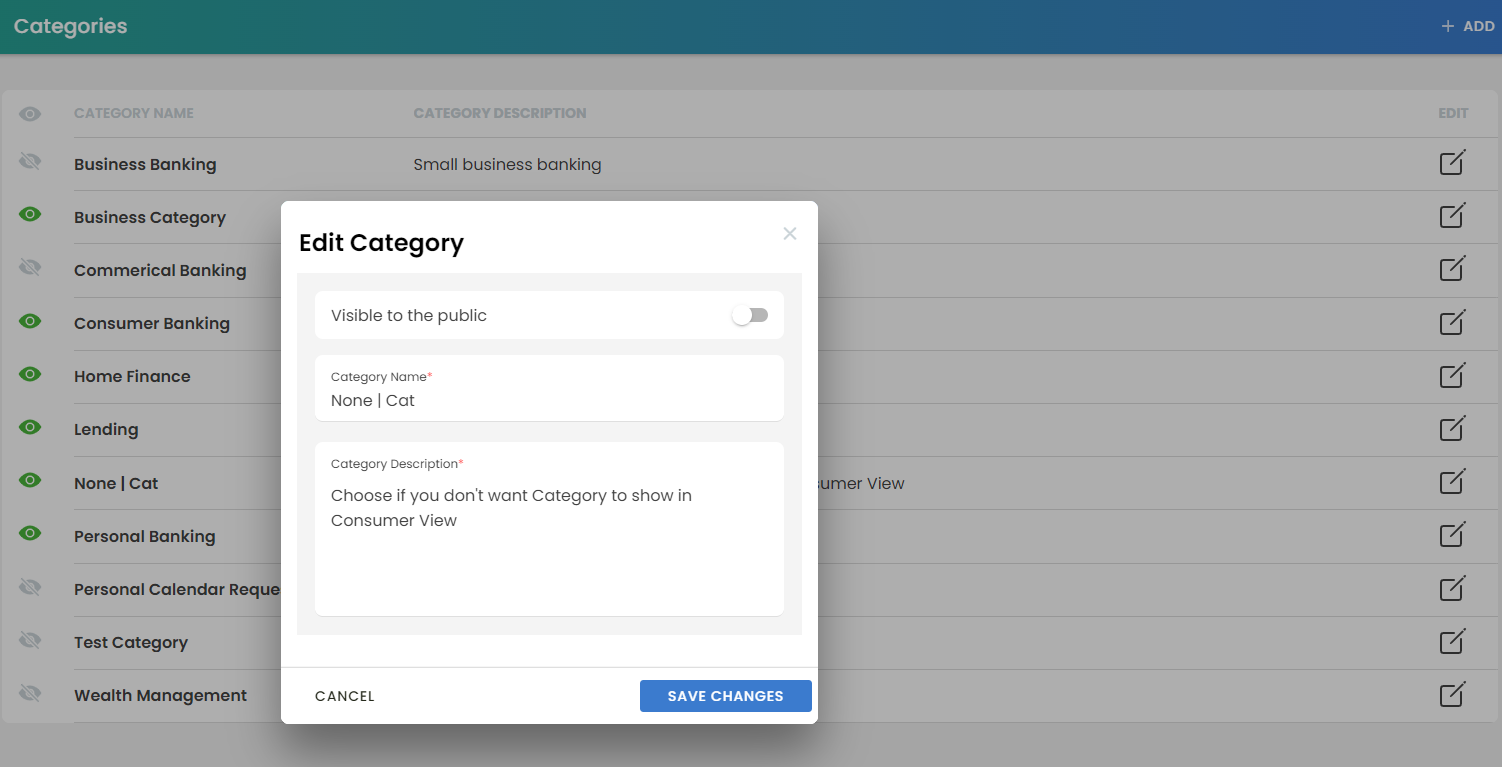
Visible to the Public indicates whether an object is visible or hidden in a Guest View. If unchecked, the object will be hidden in a Guest View. This is an important feature that is used in multiple ways. First, if you are creating new objects that are in Work in Progress, you can hide them until ready to show in a Guest View. Second, if you will be creating Guest Views that hide screens, for example, Guest Views for specific products or people, you can create 'None' Objects that are not visible. These are most often used for Categories and Sub-Categories. The None Objects will be selected when creating a Guest View that does not display Categories or Sub-Categories screens in the user flow. This will be covered in more details in the Generating Guest View video. Given the importance of this selection, note the prominent icon that is used throughout the application, with Green indicating the object is Visible to the Public

Editing a Category

Hidden ‘None’ Category
