Polycom Best Practices
Using Polycom Phones with LinkLive
LinkLive supports connectivity with select Polycom phones for users who prefer using a physical device instead of the LinkLive softphone. While most Polycom administration and configuration is handled within LinkLive Admin, users may need to adjust settings in LinkLive.app for optimal performance.
This page outlines best practices for configuring settings when using Polycom phones with LinkLive.
Polycom Settings
Set Polycom Phone Status to "Away"
To ensure proper status synchronization between LinkLive and Polycom:
Locate the "MyStat" or "MyStatus" softkey on the Polycom phone.
Press the "MyStat" or "MyStatus" button.
Scroll down and select "Away" (usually marked with a checkmark).
Note: After a reboot or power cycle, the Polycom phone may default back to "Online" status. Users should verify their status after restarting the device.
Set Up Call Forwarding to Voicemail
To configure call forwarding within LinkLive.app, follow the steps in the video tutorial below.
Important: Both status settings and call forwarding configuration must be set correctly to ensure Polycom phones function properly with LinkLive. Users should verify their phone status and configure call forwarding as instructed in the video.
This video is just an example. When following the steps, be sure to set the "Number(s) to Ring" field to voicemail@customerdomain. Replace customerdomain with your company’s domain.
Configuring Contact-Specific Notification Options
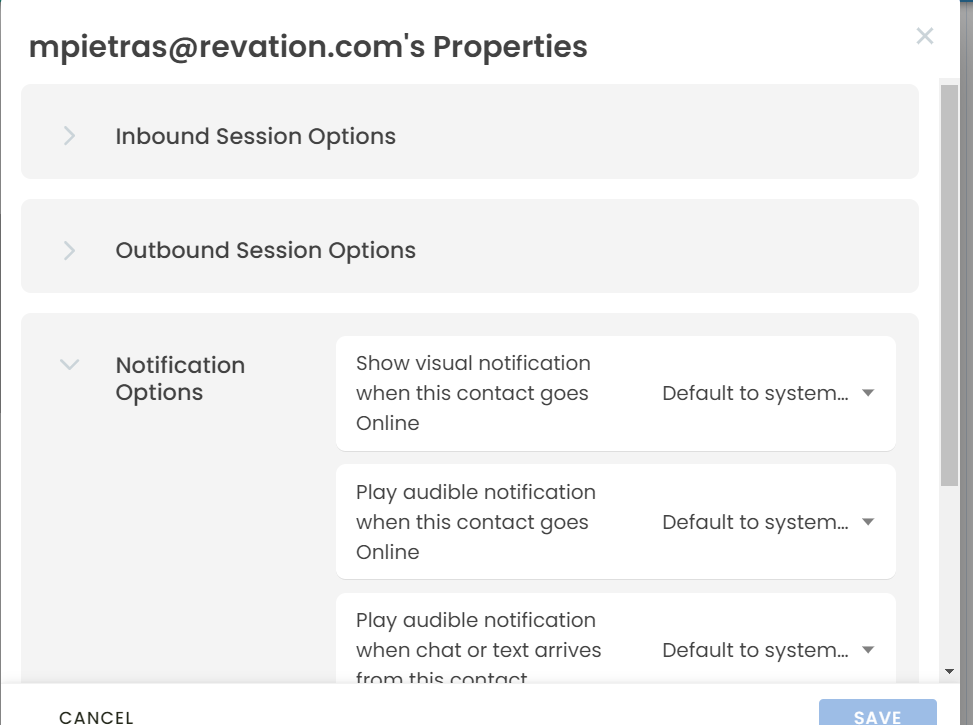
Companies using Polycom phones as contacts in LinkLive may need to configure contact-specific settings, such as inbound & outbound session behavior and notification preferences.
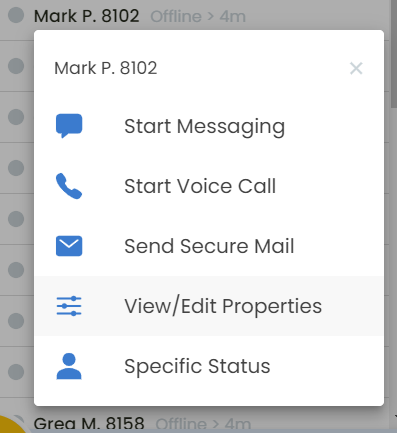
Users can view and edit these settings by right-clicking a contact in the contact list and selecting the configuration modal.
Note: These settings are the same as those found in Communicator. If assistance is needed, please contact LinkLive Support.


Identifying Polycom Contacts
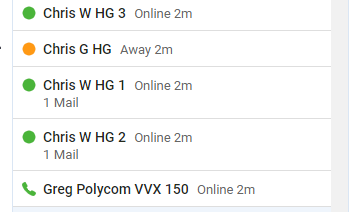
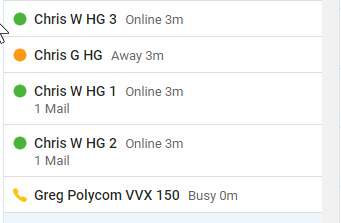
Contacts set up for Polycom phones are marked with a phone icon in the Contact List, indicating that they are audio-only contacts and cannot send or receive messages.
Polycom Contact Status Indicators
Green – The contact is available and can receive incoming calls.
Yellow – The contact is busy, currently engaged in an active call.
Gray – The contact is offline and not connected to the system.
The phone icon in the example image shows Greg Polycom, is an audio-only contact. If a user clicks on a Polycom contact, the "Start Messaging" option is grayed out, indicating that messaging is not available for that contact.

Polycom Available Status

Polycom Busy Status
Merged vs. Separate Account Configurations
Separate Account Configuration – The phone icon is always present because the contact represents a dedicated Polycom device. The contact remains audio-only at all times.
Merged Account Configuration – When the merged user logs into LinkLive.app, the phone icon is replaced with a standard circle status indicator, allowing the contact to use both messaging and voice. When the merged user logs out, the phone icon returns, indicating that the contact is now only available for audio calls via Polycom.
